
Why You’ll Love this Sweet Potato Bars Recipe
Have you ever tasted a dessert that feels like a cozy hug? That’s exactly how I feel about sweet potato bars.
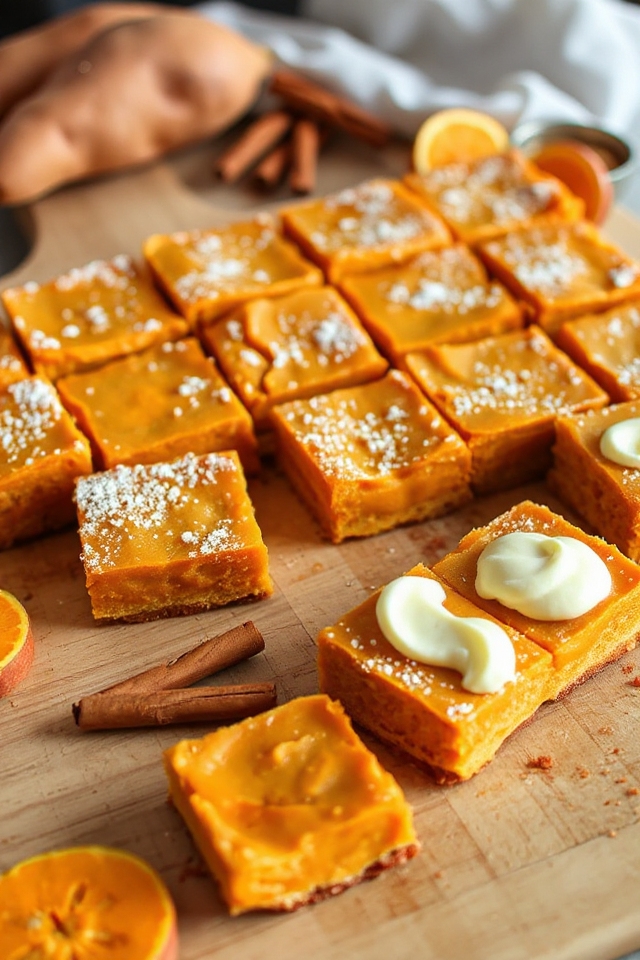
They’re the perfect balance of creamy and sweet, with a hint of warmth from spices. Every bite brings comfort, making them ideal for gatherings or a quiet evening at home.
Plus, they’re a unique twist on traditional desserts, showcasing the beauty of sweet potatoes. I love how they’re easy to make, yet impressively delicious.
Once you try them, you’ll be hooked too! Trust me, these bars are bound to become a new favorite in your dessert repertoire.
Ingredients of Sweet Potato Bars
When it comes to making sweet potato bars, gathering the right ingredients is half the battle—and trust me, it’s a delicious battle worth fighting. You’ll need a mix of pantry staples and a few special items that bring that sweet potato goodness to life.
Just imagine the warm, cozy aroma wafting through your kitchen as these bars bake; it’s enough to make anyone’s mouth water. So, let’s plunge into what you need for this scrumptious treat!
Ingredients for Sweet Potato Bars:
- 1 (18 ounce) box yellow cake mix
- 8 tablespoons of melted butter
- 1 egg
- 2 1/2 cups peeled mashed sweet potato
- 8 ounces cream cheese, softened
- 4 tablespoons of softened butter
- 2 cups confectioners’ sugar
- 2 teaspoons vanilla extract
- 2 teaspoons ground cinnamon
- 1 teaspoon pumpkin pie spice
- 3 eggs
Now, before you rush off to the store, let’s chat a bit about some of these ingredients. First off, the sweet potatoes. They’re the star of the show, so try to get the freshest ones you can find.
If you’re feeling adventurous, you could even roast them before mashing for an added depth of flavor. And don’t forget the cream cheese; it adds that luscious creaminess that makes these bars just melt in your mouth.
If you’re not a fan of pumpkin pie spice, you can always adjust the spices to your liking. Feel free to throw in a pinch of nutmeg or some ginger for a little extra zing.
Cooking is all about making it your own, right? So gather your ingredients, channel your inner baker, and get ready for a delightful experience.
How to Make Sweet Potato Bars
Making sweet potato bars is like taking a warm hug from your oven. To kick things off, preheat that trusty oven of yours to 350 degrees. It’s important to start with a warm oven so your bars bake evenly.
While that’s heating up, let’s get to the fun part—mixing it all together. In a large mixing bowl, combine 1 (18 ounce) box of yellow cake mix, 8 tablespoons of melted butter, and 1 egg. You can use an electric mixer for this. Just mix until it’s well combined and looks smooth.
Once you’ve got that lovely cake mix batter, grab your greased 13×9 baking dish, and spread the mixture evenly, packing it down to form a solid crust layer. This is like the cozy blanket under your sweet potato goodness.
Now, onto the star of the show—our sweet potatoes. In another bowl, take 2 1/2 cups of peeled mashed sweet potato (don’t skimp on this, folks; it’s where the magic happens) and mix it with 8 ounces of softened cream cheese and 4 tablespoons of softened butter. You want this to be creamy and smooth, so don’t rush it.
Once that’s done, add in 2 teaspoons of vanilla extract, 2 cups of confectioners’ sugar, 2 teaspoons of ground cinnamon, 1 teaspoon of pumpkin pie spice, and mix again until everything is blended beautifully.
And here’s where it gets a bit sticky—you’ll want to beat in 3 eggs one at a time, making sure each one is fully incorporated before adding the next. It can feel like a workout, but trust me, it’ll be worth it.
Now that you have two beautiful layers, it’s time to assemble. Spread that luscious sweet potato mixture evenly over your cake crust. It’s like a cozy blanket, nestling right on top.
Pop it in the oven and let it bake for about 50-60 minutes. Keep an eye on it; you want the center set but still soft. The smell wafting through your kitchen will make you want to plunge into it right away, but patience, my friend.
Once it’s done, let it cool before cutting it into squares. And there you have it—sweet potato bars that are sure to impress your friends and family. Just remember, if they disappear too quickly, you might need to hide a few for yourself next time.
Sweet Potato Bars Substitutions & Variations
While sweet potato bars are delicious as they are, experimenting with substitutions and variations can elevate them to new heights.
For a gluten-free option, I often swap the yellow cake mix with a gluten-free blend. You can also use almond flour for a nutty flavor.
If you’re looking to cut back on sugar, try using maple syrup or honey instead of confectioners’ sugar. Adding nuts or dried fruit can provide delightful texture, too.
For an extra twist, I sometimes mix in a bit of cocoa powder for a chocolatey version. The possibilities are endless, so have fun creating your own!
What to Serve with Sweet Potato Bars
Serving sweet potato bars is a delightful way to elevate your dessert experience, especially if you pair them with complementary flavors.
I love serving them with a dollop of whipped cream on top for added creaminess. A sprinkle of chopped pecans or walnuts adds a lovely crunch that contrasts beautifully with the soft bars.
For a rejuvenating twist, I sometimes offer a scoop of vanilla ice cream on the side. A drizzle of caramel sauce can really enhance the sweetness, too.
These pairings not only enhance the bars but also create a delightful dessert spread that everyone will enjoy!
Additional Tips & Notes
When enjoying sweet potato bars, a few additional tips can enhance your baking experience.
First, make sure your sweet potatoes are well-cooked and mashed for a smooth texture. I recommend letting the bars cool completely before cutting them; this helps them hold their shape better.
If you want an extra touch, sprinkle some chopped pecans or walnuts on top before baking. For a more vibrant flavor, feel free to adjust the spices to your taste.
Finally, store any leftovers in an airtight container in the fridge; they taste even better the next day! Enjoy your delicious creation!