Why You’ll Love this Sweet Apple Danish Recipe
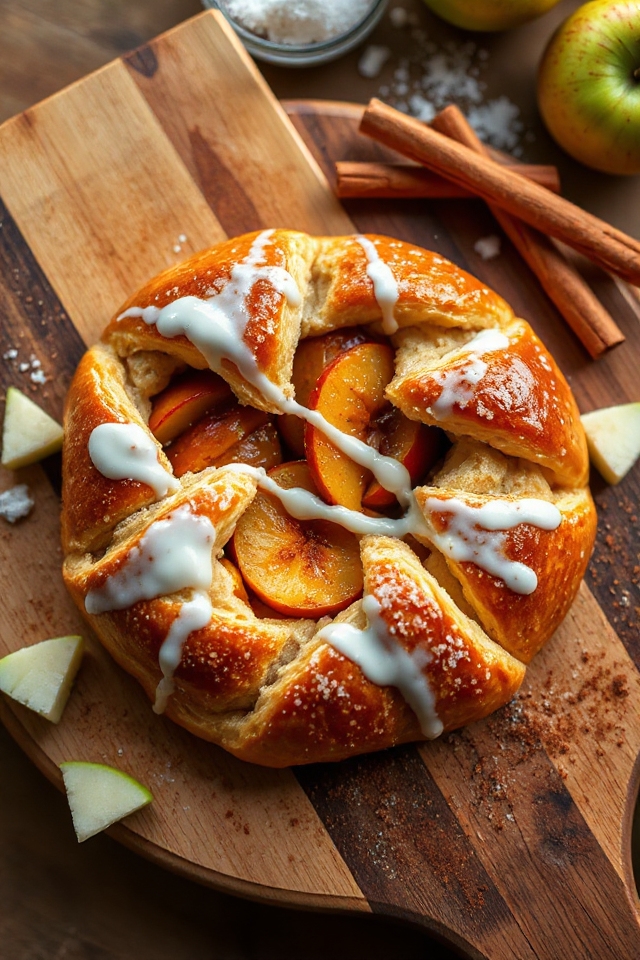
When you take a bite of this Sweet Apple Danish, you’ll instantly understand why it’s a favorite in my kitchen. The flaky pastry, combined with tender, spiced apples, creates a harmonious blend that warms your heart.
There’s something magical about the way the cinnamon and sugar meld with the fruit, elevating each bite. Plus, it’s simple to make, which means I can whip it up for breakfast or dessert without fuss.
The drizzle of sweet glaze adds a perfect touch, making it look as good as it tastes. Trust me, once you try it, you’ll be hooked!
Ingredients of Sweet Apple Danish
When it comes to baking, having the right ingredients is key to whipping up something delicious. For this Sweet Apple Danish, you’ll need a few staple items that you might already have in your pantry, along with some fresh apples to really bring it to life.
Gather these ingredients, and you’ll be well on your way to creating a delightful treat that’s perfect for breakfast or dessert. Let’s jump into what you’ll need!
Ingredients for Sweet Apple Danish:
- 2 1/2 cups flour
- 1 teaspoon salt
- 1 cup canola margarine
- 1 egg yolk
- 3/4 cup milk
- 7-9 medium apples, peeled, cored, and sliced
- 3/4 cup granulated sugar
- 2 tablespoons flour (for the apple mixture)
- 1 1/2 teaspoons ground cinnamon
- 1 cup confectioners’ sugar (for the glaze)
- 2 tablespoons water (for the glaze)
- 1 teaspoon vanilla extract (for the glaze)
Now, before you rush to the grocery store, let’s chat about some of these ingredients.
First off, the apples you choose can make a big difference in flavor. I usually opt for a mix of sweet and tart varieties, like Granny Smith and Honeycrisp, to balance things out.
And if you’re wondering about the margarine, it’s a great alternative to butter if you’re looking for a dairy-free option, but butter works just as well if you prefer that rich flavor.
Oh, and don’t forget to have some extra flour on hand for rolling out that pastry; trust me, it can get a little sticky!
How to Make Sweet Apple Danish
Let’s jump into how to make this delightful Sweet Apple Danish, shall we? First things first, you’ll need to whip up the pastry dough. Grab your food processor—if you have one, that is. If not, your mixing skills will come in handy, and you can totally mix it by hand.
Start by tossing in 2 1/2 cups of flour, 1 teaspoon of salt, 1 cup of canola margarine, 1 egg yolk, and 3/4 cup of milk. Pulse it all together until it transforms into a smooth, lovely dough. If you’re feeling adventurous, you might even want to roll up your sleeves and mix it in a bowl. Either way, once it’s smooth, roll that dough into a ball and set it aside. I always find the dough feels like a little self-hug as I roll it out, but maybe that’s just me!
Next, let’s turn our attention to those beautiful apples—7 to 9 of them, peeled, cored, and sliced. Honestly, this is where the magic happens. In a large bowl, toss those apple slices with 3/4 cup of granulated sugar, 2 tablespoons of flour, and 1 1/2 teaspoons of ground cinnamon. The scent of cinnamon and apples together is like a warm embrace for your kitchen.
Now, divide your pastry dough into two sections. Roll one portion out to fit a greased cookie sheet—don’t stress if it doesn’t cover every inch. That’s where the apple filling comes in! Spread that cinnamon-infused apple mixture over the dough like you’re creating a cozy blanket for your apples. Roll out the second half of the pastry and layer it on top. Give it a little love by brushing it with whipped egg white; this will make it shine beautifully in the oven.
Now, it’s time for the oven to work its magic. Preheat that trusty appliance to 375°F and bake your Danish for about 20 minutes, or until it’s lightly golden. As it bakes, you’ll have a moment to marvel at how delicious your kitchen smells.
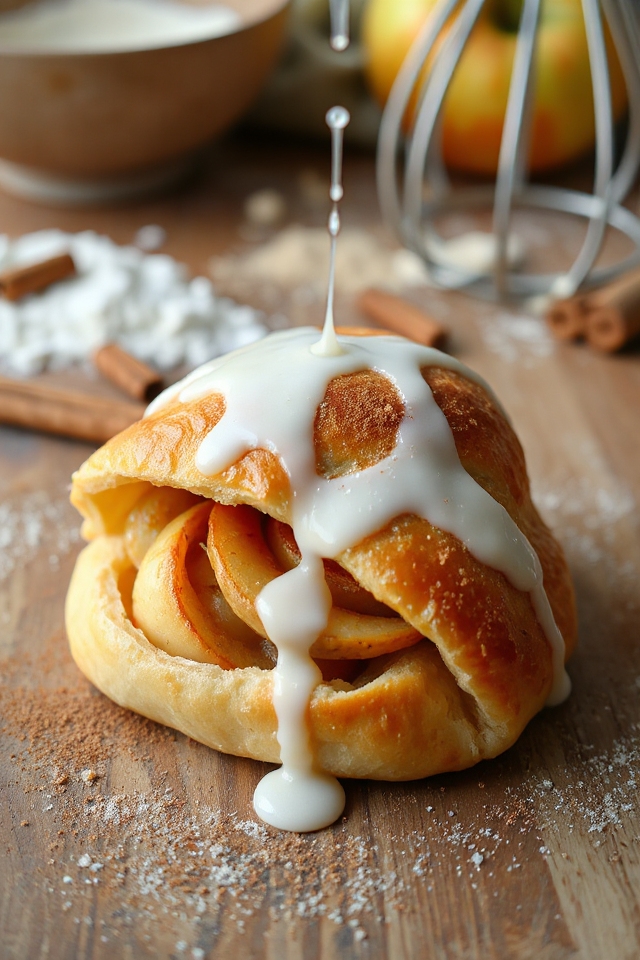
While you’re waiting, you can mix up the glaze. In a small bowl, combine 1 cup of confectioners’ sugar, 2 tablespoons of water, and 1 teaspoon of vanilla extract. Once the Danish is done baking and has cooled for a minute (because you definitely don’t want to burn your tongue), drizzle that sweet glaze over the top.
There you have it—a Sweet Apple Danish that’s not just a treat, but a warm hug in pastry form. Enjoy every bite, because you totally deserve it!
Sweet Apple Danish Substitutions & Variations
After enjoying the delightful process of making your Sweet Apple Danish, you might find yourself wanting to switch things up a bit.
You can substitute the apples with pears or peaches for a different flavor profile. If you’re in the mood for a nutty twist, consider adding chopped walnuts or pecans to the filling.
For a spicier kick, try mixing in some nutmeg or ginger. You could even use a store-bought puff pastry instead of making the dough from scratch.
Finally, experiment with different glazes—maple syrup or a simple lemon glaze could add a revitalizing touch to your Danish!
What to Serve with Sweet Apple Danish
While enjoying a warm slice of Sweet Apple Danish, I often think about what pairs well with its delightful flavors. A cup of freshly brewed coffee or spiced chai tea complements the sweetness beautifully.
If I’m in the mood for something fruity, a side of mixed berries adds a revitalizing touch. For a special brunch, I like serving it with whipped cream or a scoop of vanilla ice cream, creating a delightful contrast.
Finally, a drizzle of caramel sauce elevates the experience, making each bite even more indulgent. Trust me, these pairings will enhance your Sweet Apple Danish enjoyment!
Additional Tips & Notes
To guarantee your Sweet Apple Danish turns out perfectly every time, I recommend a few key tips. First, use cold margarine for a flakier pastry; it makes a big difference!
Next, don’t skip brushing the egg white on top for that beautiful golden finish. If you’re short on time, store-bought puff pastry works well too.
For a flavor twist, try adding a dash of nutmeg or lemon juice to the apples.
Finally, let your Danish cool slightly before drizzling the glaze; it’ll prevent it from melting away.
Enjoy the process, and your Danish will impress every time!